Create Your First Game
This tutorial guides you step by step through creating your first game with Grid Engine and Phaser.js using Typescript.
1. Create a Phaser Game
The first step is to set up a Phaser.js game. There are several ways to do this. In this tutorial we use Vite by cloning the official phaser vite template.
Use Github Template
Simply navigate to https://github.com/phaserjs/template-vite-ts and either clone this repository or create a repository from the template by clicking "Use this template". For more information, check out the github docs for "creating a repository from a template".
To clone the repo run the following commands in your terminal:
mkdir my-grid-engine-gamegit clone https://github.com/phaserjs/template-vite-ts.git my-grid-engine-gamecd my-grid-engine-gamenpm installYou can test your game now by running:
npm run devIf you navigate your browser to the displayed URL, you should see the example phaser game.
2. Install Grid Engine
Now it is time to install Grid Engine:
npm i --save grid-engineWe need to register Grid Engine as a phaser plugin in main.ts:
// src/main.ts
import { GridEngine } from "grid-engine";

// ...

const config: Types.Core.GameConfig = {
  // ...
  plugins: {
    scene: [ {
        key: "gridEngine",
        plugin: GridEngine,
        mapping: "gridEngine",
      },
    ],
  },
  // ...
};
3. Add a Tile Map
Before we add the tile map, let us add two more settings to the phaser game config:
// src/main.ts

// ...
const config: Types.Core.GameConfig = {
  // ...
  scale: {
    mode: Phaser.Scale.FIT,
    autoCenter: Phaser.Scale.CENTER_BOTH,
  },
  pixelArt: true,
  // ...
};
pixelArt: true makes sure that the pixel graphics scale without getting blurry. We remove mode: Phaser.Scale.FIT for now, so that it does not scale up our game based on the browser window size. Feel free to change that for your game later if you want.
Now it is time to add the actual tile map. Download tilemap.json and grid-engine-tileset.png and put them into public/assets.
INFO
The tile map was created with Tiled map editor. Check out our collision tutorial for more details about creating tile maps in Tiled for Grid Engine.
Then in src/scenes/Preloader.ts add the following code to the preload method:
// src/scenes/Preloader.ts

export class Preloader extends Scene {
  // ...
  preload() {
    // ...
    this.load.image("tiles", "grid-engine-tileset.png");
    this.load.tilemapTiledJSON("tilemap", "tilemap.json");
  }
}
This makes sure the tile set and tile map get loaded.
In order to show the tile map in our game, we need to create it in the game scene:
// src/scenes/Game.ts

export class Game extends Scene {
  // ...
  create() {
    this.cameras.main.setZoom(4);
    const tilemap = this.make.tilemap({ key: "tilemap" });
    tilemap.addTilesetImage("grid-engine-tileset", "tiles");
    for (let i = 0; i < tilemap.layers.length; i++) {
      tilemap.createLayer(i, "grid-engine-tileset", 0, 0);
    }
  }
}
By setting the main camera zoom to 4 we make sure that our pixel graphic assets are not rendered too small. Feel free to change the scale factor as you prefer.
The remaining lines are responsible for creating an actual tile map in phaser using our tile set and creating all the tile map layers.
If you run the game now you will notice that the camera is not positioned on the center of the tile map yet. We will change that in the next step when we add our player character!
4. Add a Player Character
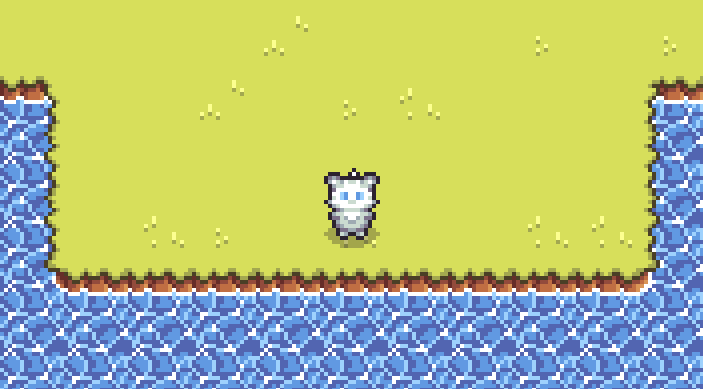
Let's add "Fluffy" to our game!

Download fluffy.png and put it into the public/assets directory.
We make sure that our character spritesheet is available in our game scene by preloading it:
// src/scenes/Preloader.ts

export class Preloader extends Scene {
  // ...
  preload() {
    // ...
    this.load.spritesheet("fluffy", "fluffy.png", {
      frameWidth: 16,
      frameHeight: 20,
    });
  }
}
Now we generate a sprite for our player character and make the camera follow it:
// src/scenes/Game.ts

export class Game extends Scene {
  // ...
  create() {
    // ...
    const playerSprite = this.add.sprite(0, 0, "fluffy");
    this.cameras.main.startFollow(playerSprite, true);
    this.cameras.main.setFollowOffset(
      -playerSprite.width / 2,
      -playerSprite.height / 2
    );
  }
}
We give the camera an offset, so it is centered at the center of our player character sprite and not at its upper left corner.
5. Initialize Grid Engine
To initialize Grid Engine we call its create method with a config object:
// src/scenes/Game.ts

export class Game extends Scene {
  // ...
  private gridEngine!: GridEngine;
  // ...
  create() {
    // ...
    const gridEngineConfig = {
      characters: [
        {
          id: "fluffy",
          sprite: playerSprite,
          walkingAnimationMapping: 0,
          startPosition: { x: 15, y: 14 },
          offsetY: -4,
        },
      ],
    };

    this.gridEngine.create(tilemap, gridEngineConfig);
  }
}
We give "fluffy" as a character ID, use our previously created sprite and choose a starting position of (15, 14), which is the center of the tile map. We set walkingAnimationMapping to 0. If your character sprite sheet contains several characters this allows to pick the right one. Setting offsetY to -4 lets the part of the sprite where the feet touch the ground appear in the center of the tile. Otherwise the character looks like it is standing on the bottom part of a tile.
The following image shows our character with (right) and without (left) offset:

6. Add Movement
The last step of our grid movement example is to add actual movement controls. To achieve that we add an update method to our game scene and call the corresponding movement methods of Grid Engine whenever the player presses an arrow key:
// src/scenes/Game.ts

import { Direction, GridEngine } from "grid-engine";

export class Game extends Scene {
  // ...
  update() {
      const cursors = this.input.keyboard?.createCursorKeys()!;
      if (cursors.left.isDown) {
        this.gridEngine.move("fluffy", Direction.LEFT);
      } else if (cursors.right.isDown) {
        this.gridEngine.move("fluffy", Direction.RIGHT);
      } else if (cursors.up.isDown) {
        this.gridEngine.move("fluffy", Direction.UP);
      } else if (cursors.down.isDown) {
        this.gridEngine.move("fluffy", Direction.DOWN);
      }
  }
}
Congratulations! If you run the game now you are able to move fluffy around the map using the arrow keys!
Of course, this is just the beginning. Grid Engine offers many more features. Take a look at the tutorials, the API docs or the examples to see what's possible.